Income/Expense Accounts
You can track income and expenses in QBO via your Income/Expense Accounts. You can use the Balance Sheet and Profit & Loss statements (Reports in QBO) to view this financial data.
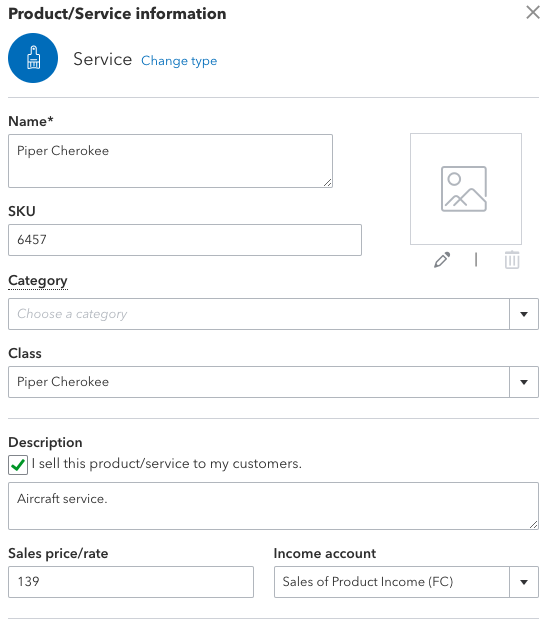
With the QBO Integration sync, all items, adjustments, aircraft, and instructors become a Product or Service in QBO. In QBO if you go to Settings ⚙, and then Products and Services you will see them all listed there. If you edit one, you can change the income/expense account attached to it.
To create a new Income/Expense Account, go to Settings ⚙, and then Chart of accounts.
Many accounts in chart of accounts have an account register where you can review the transaction history and current balance. For accounts that don’t have a register, you can run a report to see transactions on that account. To view the register or reports from your chart of accounts list, select either View register or View report from the Action column. Click here to learn about account types in the chart of accounts in QBO.
Classes
If you want to get more granular and group income/expenses into different categories different from those provided by the Chart of Accounts, then you can use Classes.
What is the difference between Using Classes and Sub Classes vs Accounts and Sub-Accounts in QBO? The main difference between class and account, is that every transaction must have an account assigned to it, while it’s optional to assign a class.
Note: Only the QuickBooks Online Plus and the Advanced Account have the Class feature.
To enable:
You will need to make sure you have Class Tracking turned on as well as set up your Class List in QBO.
Step 1: Turn on class tracking
- Go to Settings ⚙ and select Account and Settings.
- Select Advanced, then select the Categories section to edit.
- Check Track classes.
- Check Warn me when a transaction isn’t assigned a class. This is optional, but it’s good to turn on, so when you look at reports, you know everything got classified.
- Under Assign classes, select One to entire transaction or One to each row in transaction.*
- Select Save, then Done.
Click here to learn more.
Step 2: Set up your class list
- Go to Settings ⚙ and select All Lists.
- Select Classes.
- Select New. Give this class a name.
- To add a sub-class, select Is a sub-class and select the main class. You can nest up to five classes.
- Select Save.
Click here to learn more.
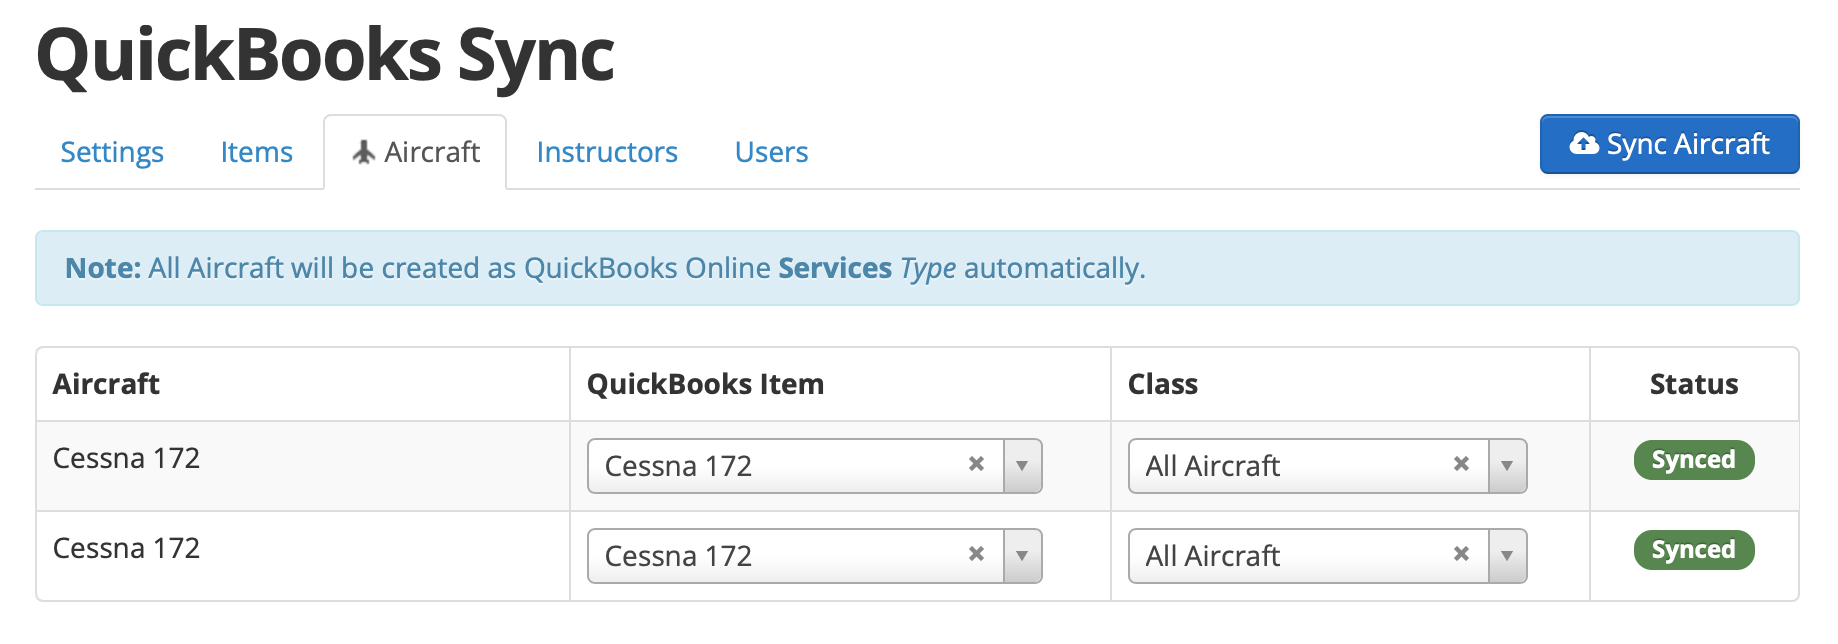
Once finished, you can then go to your QuickBooks Settings in Flight Circle to map your Items, Aircraft, Instructors, and Users/Customer to your specific classes.
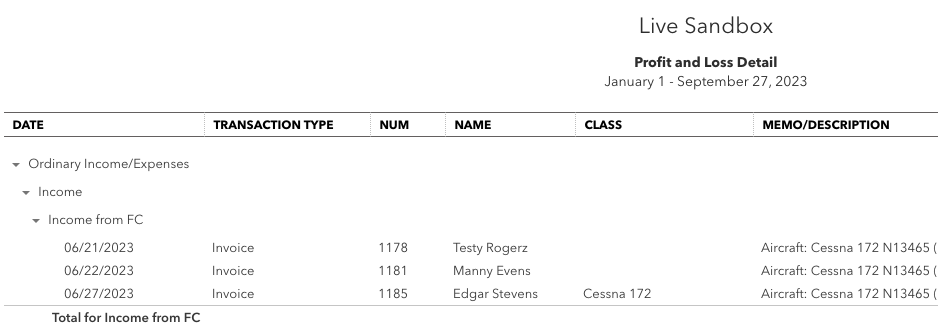
In QBO, Go to Reports > Under Business Overview select Profit and Loss by Class.