You can create more than one location for your Organization
First, add more locations by going to Manage > General Settings. Below Timezone select Manage additional locations > +New Location.
Then go to Manage > Aircraft > Options > Edit > Location to assign the default location for each aircraft. You can sort this order by drag and drop. The same order will appear on the schedule.
Go to Manage > Instructors to assign each instructor to a default location. Options > Edit > Location.
For your instructors that work from multiple locations do not assign a location for them. Leave the location blank or use the x to remove a location. When no location is assigned they will appear at the bottom of the schedule and not under a specific location.
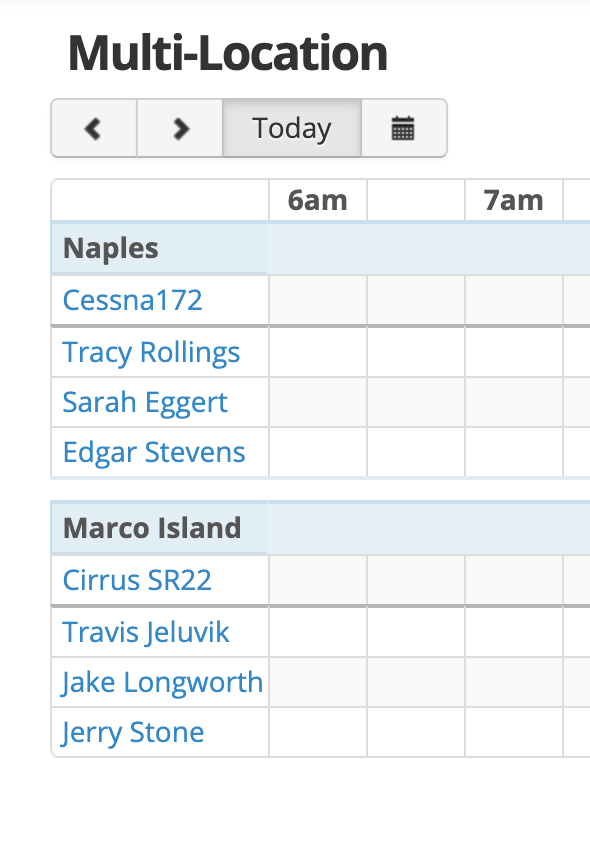
Once you are done with configuring you will see the schedule automatically separate by location. You will also see Location on a new reservation box. A new reservation will auto populate location based on Aircraft’s default setting. If no aircraft, it will populate based on Instructor’s default.
If there is a conflict with a reservation you will see an exclamation point on the reservation ! <– This means the location booked is non-standard. For example, if the instructor is at Location B but the reservation is set to Location A.
You can also use the Scheduling Restriction: Prevent mis-match aircraft and instructor locations. If then is enabled it will prevent a user from scheduling a flight with an instructor listed at a different location from the one they are trying to schedule at.
Notifications:
- Emails and SMS for Add/edit/cancel emails, all have name, address, and phone for the correct location.
- 24 hour reminder email shows weather for the correct location.