General Tab
Organization’s Profile Information:
- In your General Settings, you can change/edit your Organization’s details.
Payment Types:
- By default, only administrators and instructors have access to all payment types before configuring them.
- To add a new custom payment type select +Payment Type
- Add groups who are allowed to use that rate while making a payment. You may need to create a new group or edit preexisting ones. To do so, go to Manage > Groups.
- Card payment type requires that card processing be enabled for your account. If card processing is not enabled, this payment option will not be displayed to anyone. Click here if you would like to get started with credit card processing.
- Apple Pay is enabled for all customers who have credit card processing enabled in their account. This requires the user to use Safari from a computer, or iPhone. The user must have a card in their Apple Pay Wallet. For the user, it is only available for My Account payments or during checkin. If you are using Apple Pay through the Terminal then you will want to select Terminal as the Payment type, then on the Terminal select Apple Pay.
It also requires the FBO/Organization uses Fiserv (NOT Blue Pay). If you need to upgrade from Blue Pay to Card Connect please let us know. It is an easy transition. Apple Pay also works from any of the new Bolt terminals.
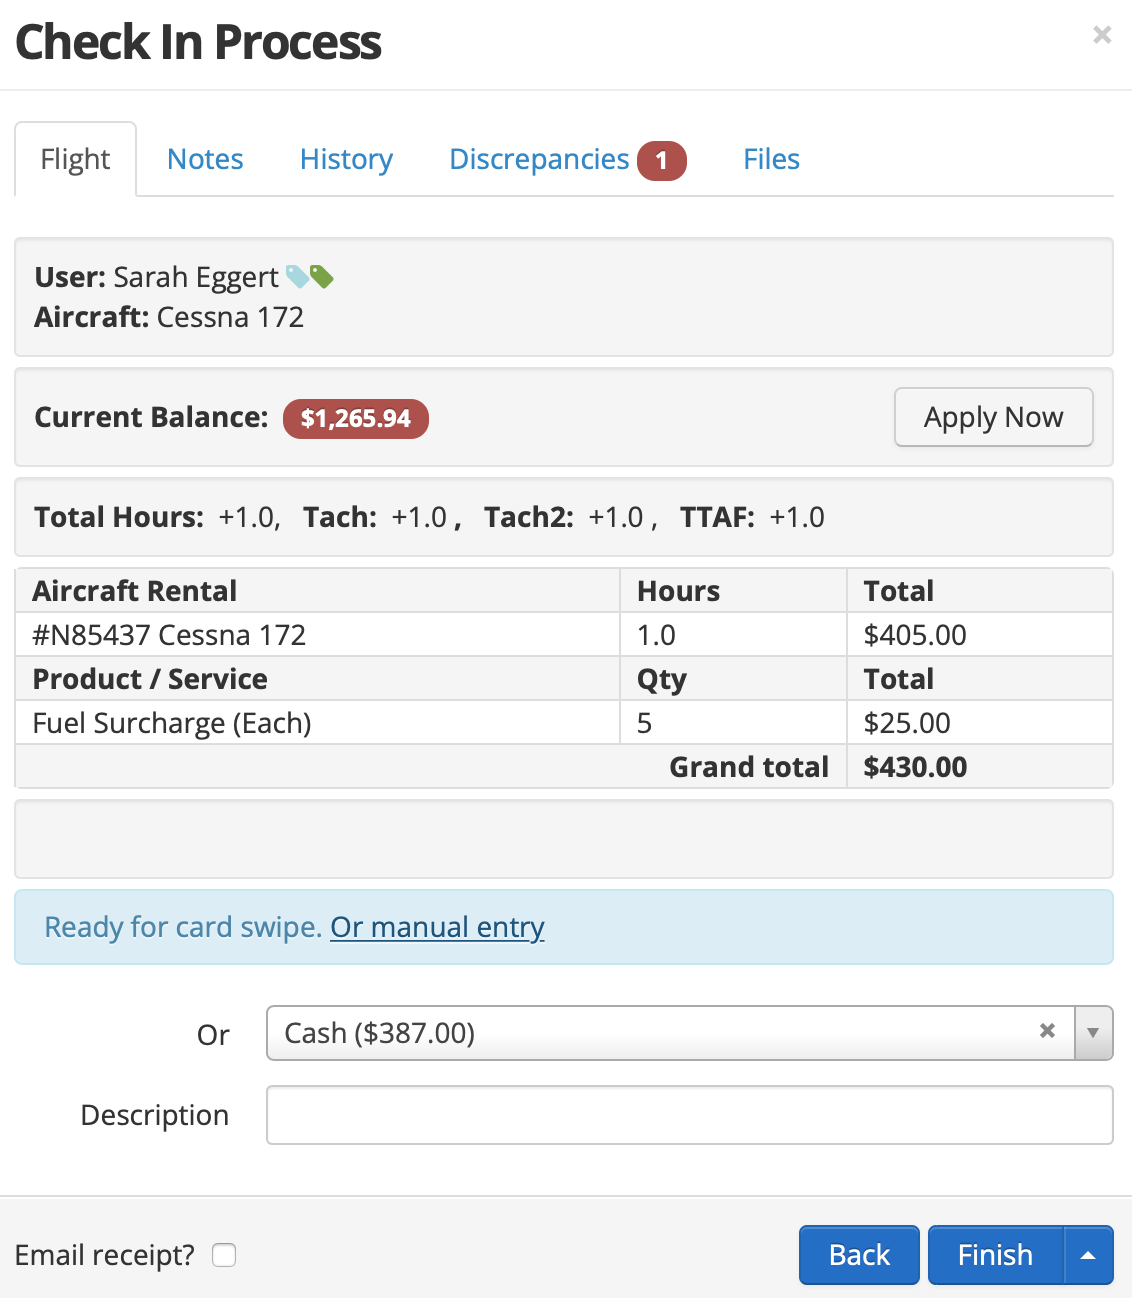
The Payments Received Report will total each payment type.
Tip: Drag and Drop to re-order payment types.
Discounts (eg. Cash):
You can automatically apply a discount when the payment method is used. The most popular is cash and check discounting. Set the percentage for each payment type respectively.
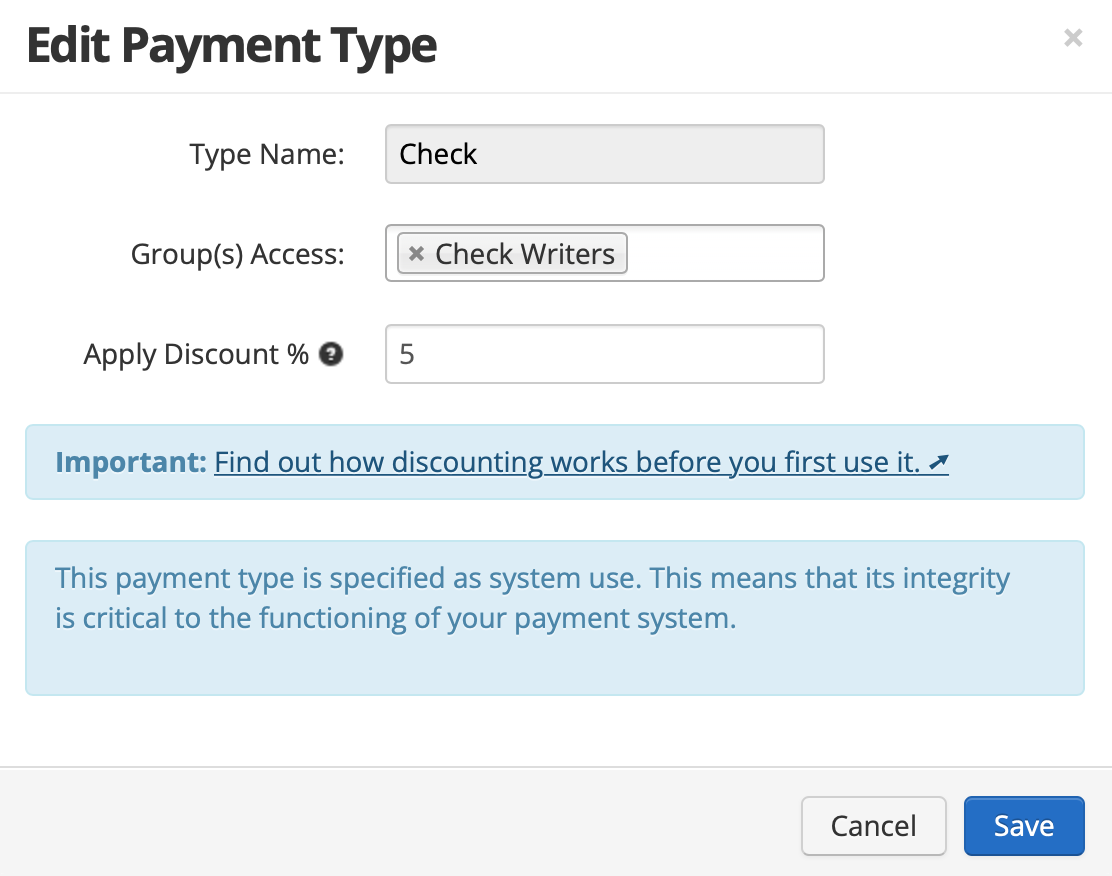
Once added, you will see the discount applied during the time of payment.
IMPORTANT: When the payment type is used, an additional credit will be applied to the account. To first adopt Discounting, consider raising all existing rates. You may also need to raise existing balances.
- Weather Link: By default, we add https://www.windy.com/KAPF <– but with your airport identifier. You can change this to a custom link. Example: http://www.weather.com/weather/tenday/29649. Make sure to include your location details like city & zip, etc.
- Squawk/Discrepancy Manager – You have the option to enable or disable. If you enable, your users will be able to see and change the status of all squawks/discrepancies.
- Billing Message – The message you choose to add here will be displayed in the email message when sending billing.
- New Reservation Information: The message you choose to add here will be displayed in the email message they get once a reservation is created.
- Show signature line – Yes/No option. The signature line shows on all receipts. Receipts can be found in the users ledger as well as right after checkin.
Taxes Tab
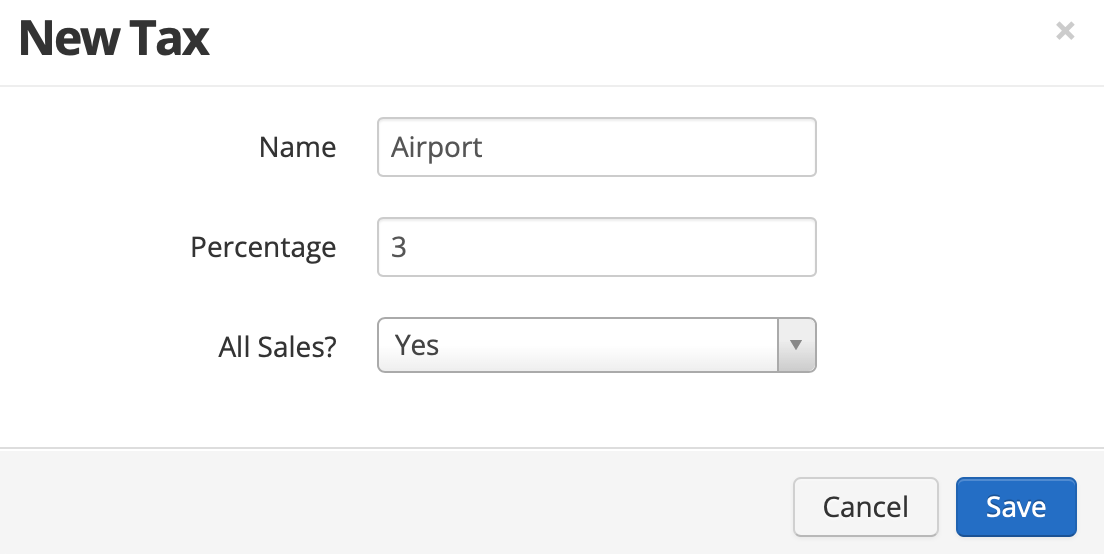
Taxes > +New Tax
- This is only for taxes that apply to ALL sales. E.g. airport tax. If this is Enabled it will apply to all items, including Recurring Charges.
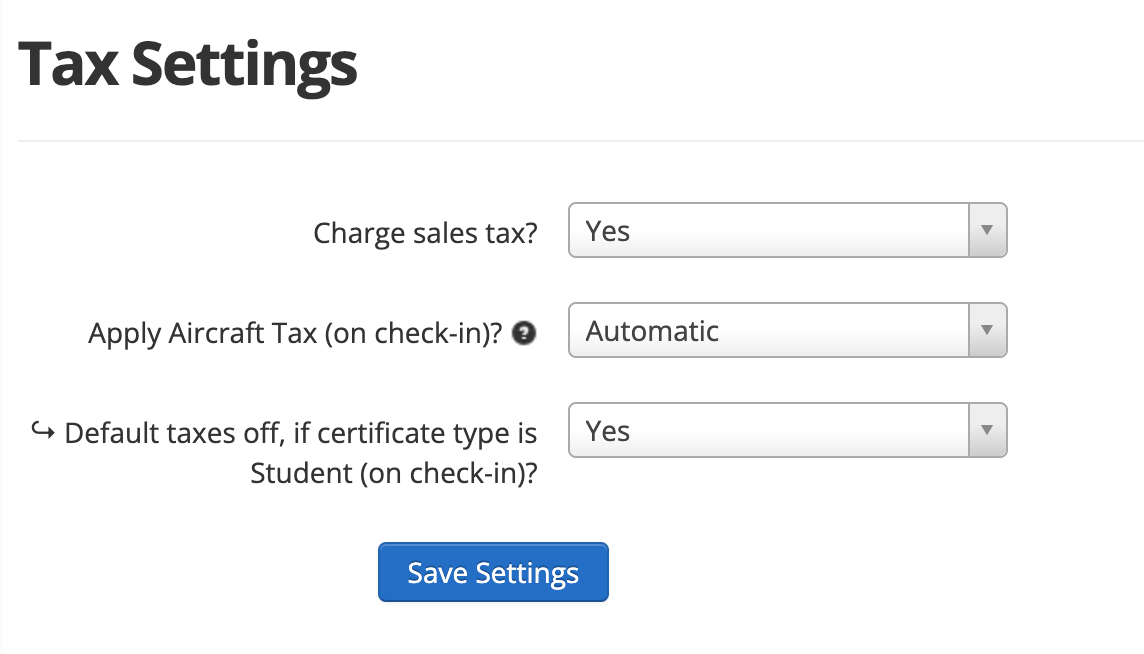
Apply Aircraft Tax (on check-in)? Set to Automatic if you want taxes to default OFF when there is an instructor attached to the reservation, or if the user is a Certificate Student. If you still want to tax Student solo flights, select No where it says Default taxes off, if certificate type is Student (on check-in)?
NOTE: If you want to set up taxes just for aircraft and items individually, then visit each aircraft and item to add. Manage > Aircraft > All Aircraft > Tap one > Scroll to bottom of the page > Add Tax > Save. Manage > Items > Tap the item to edit > Taxes enabled > Yes. You also have the option to exempt a group of individuals to not receive the tax.
Subscription Tab
- Here you can add/update your card for your subscription!